Wednesday, September 8, 2010

Tuesday Tips - Getting Centered

(Okay, so it’s not Tuesday, but it’s been so long I figured I better post anyway!)

In order to start any stitching project, it is proper to start in the middle of your fabric and work out. There is a very good reason for this: if you start in a corner and didn’t measure properly, you might not end up with enough fabric to finish the piece!

Fabric Size

Your fabric should be large enough for your pattern, based on the number of stitches in both length and width, plus about 3 inches around all edges for finishing. To get the proper measurements, you can ask the nice salesperson at the craft store to help or follow these steps (this does require some math):

  1.  Determine the total stitches from the pattern. This is usually listed as the pattern dimensions.
  2. Divide the number of stitches in the pattern by the count of your fabric to get your total finished piece size. The fabric count is the number of stitches per inch; for example, Aida 14 has 14 stitches per inch.
  3. Add 6 inches (3 inches per side) to each dimension.
  4. Buy fabric with at least these dimensions.

So if you have a piece that is 112 x 140 stitches (8” x 10”), you will need a piece of Aida 14 count fabric that is 14” x 16.”

Preparing the fabric

You may notice that some fabrics tend to fray at the edges. While this may not be a big deal in the beginning, over time these straggling bits of thread do become annoying. To prevent fraying, either wrap the edges in some masking tape or zig-zag stitch along the edge with your sewing machine.

Finding the Center

Now to the heart of the story: finding the center of your fabric.

To do this, simply fold your fabric in quarters, lengthwise and widthwise. At the folded point, this is your center. Poke a needle into this point so you don’t loose it after you put the fabric in your hoop. This is where your first stitch will be placed.

See this quickie slideshow for some illustrations.

Make sure you find the center stitch of your pattern: it is marked with arrows on the edges of the chart.

For more advanced projects, or if you are undertaking a project that is larger than one you’ve done before, it may be helpful to mark the center with a few basting stitches. Take a piece of thread that is a different color and create very long stitches that cross the center point of your fabric. Make sure they are loose enough so that you can pull them out later, but tight enough that they are useful. It’s a fine line. :-)

Sunday, June 20, 2010

Finally Finished!


Wow, I tell you this has been one of the longest projects I have worked on in my life! After a year and a half, it is finally finished. Ok, so it didn't help that I sold a house, bought a house, moved twice, and started an Etsy business during that time, as well.

"Sacred Connection" by Dimensions Gold designs, stitched on 18 count navy blue Aida fabric. Stitching on such dark fabric is a real challenge to the eyes! Definitely needed extra light for this one.  And instead of so many french knots for all the little stars, I used white Mill Hill glass beads. 

I already stitched a companion piece, "Hidden Spirits," in 2008.  Another tough one, but somehow didn't seem to take so much time.  Maybe I have selective memory.

So, Happy Father's Day, Dad!  Now you have the set to finish decorating.  Enjoy!

Friday, April 9, 2010

Friday Fun Find - Unusual Crafters

Truckers!

I saw this online via the Wall Street Journal and thought it was too good to miss a posting.  I know it's not my traditional "Friday Fun Find," but we need to shake it up a little!

Who would’ve thunk it? Can you imagine it?  A big, burly, tattoed guy sitting in a truck cab knitting a pastel sweater for his wife. A formidable, ex-soldier making a quilt of yellow and purple flowers.

Since the trucking industry has suffered with the economy, many truckers have more time on their hands between hauls. That gets boring. So, many have taken up the art of crafting in their cabs, mainly knitting and machine quilting. But I think it’s going to be a long time before talk of threads and fabric swatches are heard amidst the din of truck stops!

Just goes to show you: appearances can be deceiving!

Tuesday, March 23, 2010

Tuesday Tips - Tutorial on how to secure your thread neatly

I was going to save this post for a later date, but I realized I’ve been slacking lately. So here is my first official tutorial! It is also going to be posted on the Etsy CREST blog this week as part of their needlecraft week. (If you don’t follow etsyCREST, you should! :-) )

Many of my friends comment on how neat the back of my stitching is. True, there is a bit of planning involved in my stitching “trail,” but much of it is how I secure my thread when I begin stitching. This may be non-traditional for many and some may feel that I am cheating. It is a sort of knot, which is a no-no in cross stitch! But it’s a nice flat knot, I assure you! (I’m such a rule breaker!) This was taught to me by a friend of my mother’s when I was a few years into my stitching habit.

Note: This only works if you are stitching with an even number of strands.

1. Start by cutting a piece of floss twice as long as you normally work with. I tend to cut mine about arm’s length.

2. If you are stitching with 2 strands (the most common), separate out only 1 strand of floss. Fold it in half and thread the open ends through the eye of your needle, leaving the loop on the end you will stitch with.

3. Bring the needle up through the back and make your first stitch as you normally would. Instead of leaving a “tail” to stitch over, bring your needle through the loop and pull taught. This creates the flat knot. (Images are of the back of the fabric.)

Note: Don’t pull too tight or you risk pulling the knot through to the front.

4. Continue stitching as usual and when you come to the end, thread the needle behind the last few stitches as you normally would. Be sure to clip the threads close to the fabric so you don’t leave thread hanging out. In the images, I started in the bottom left corner and ended in the top left corner.

So essentially the back looks the same as before, you just have fewer “beginning and ending” spots visible, which makes it look just a little cleaner.

Saturday, March 13, 2010

My Boys

Who wouldn't love these guys?  They make me smile.

Friday, March 12, 2010

Friday Fun Finds - Upcycled and Recycled!

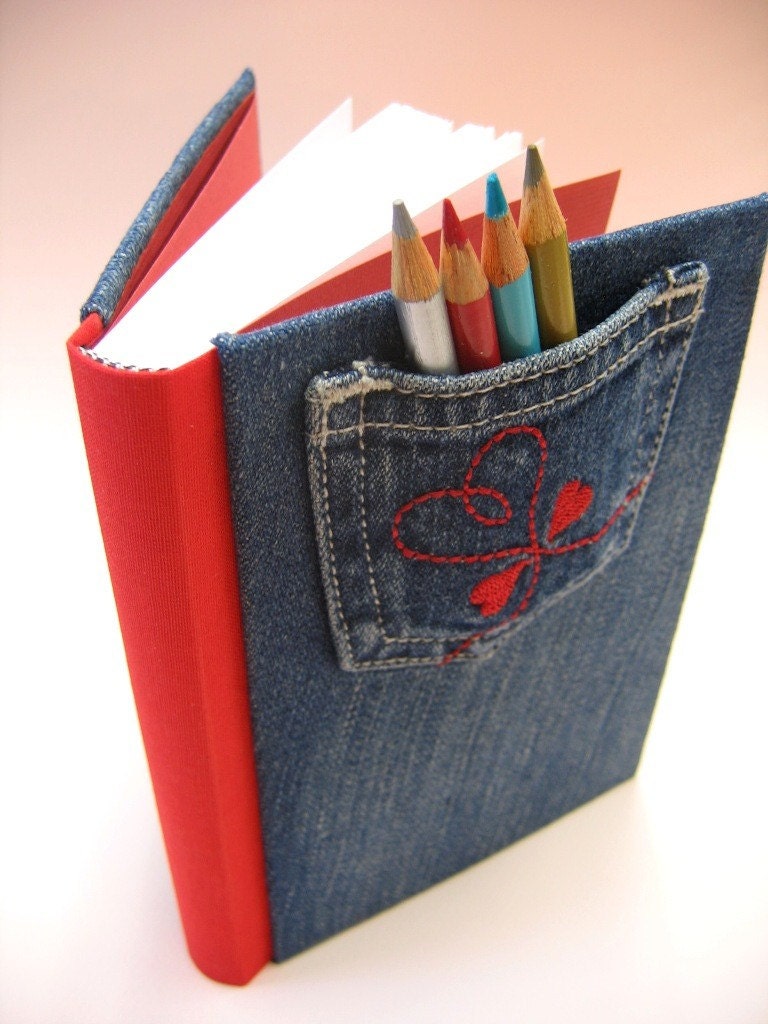
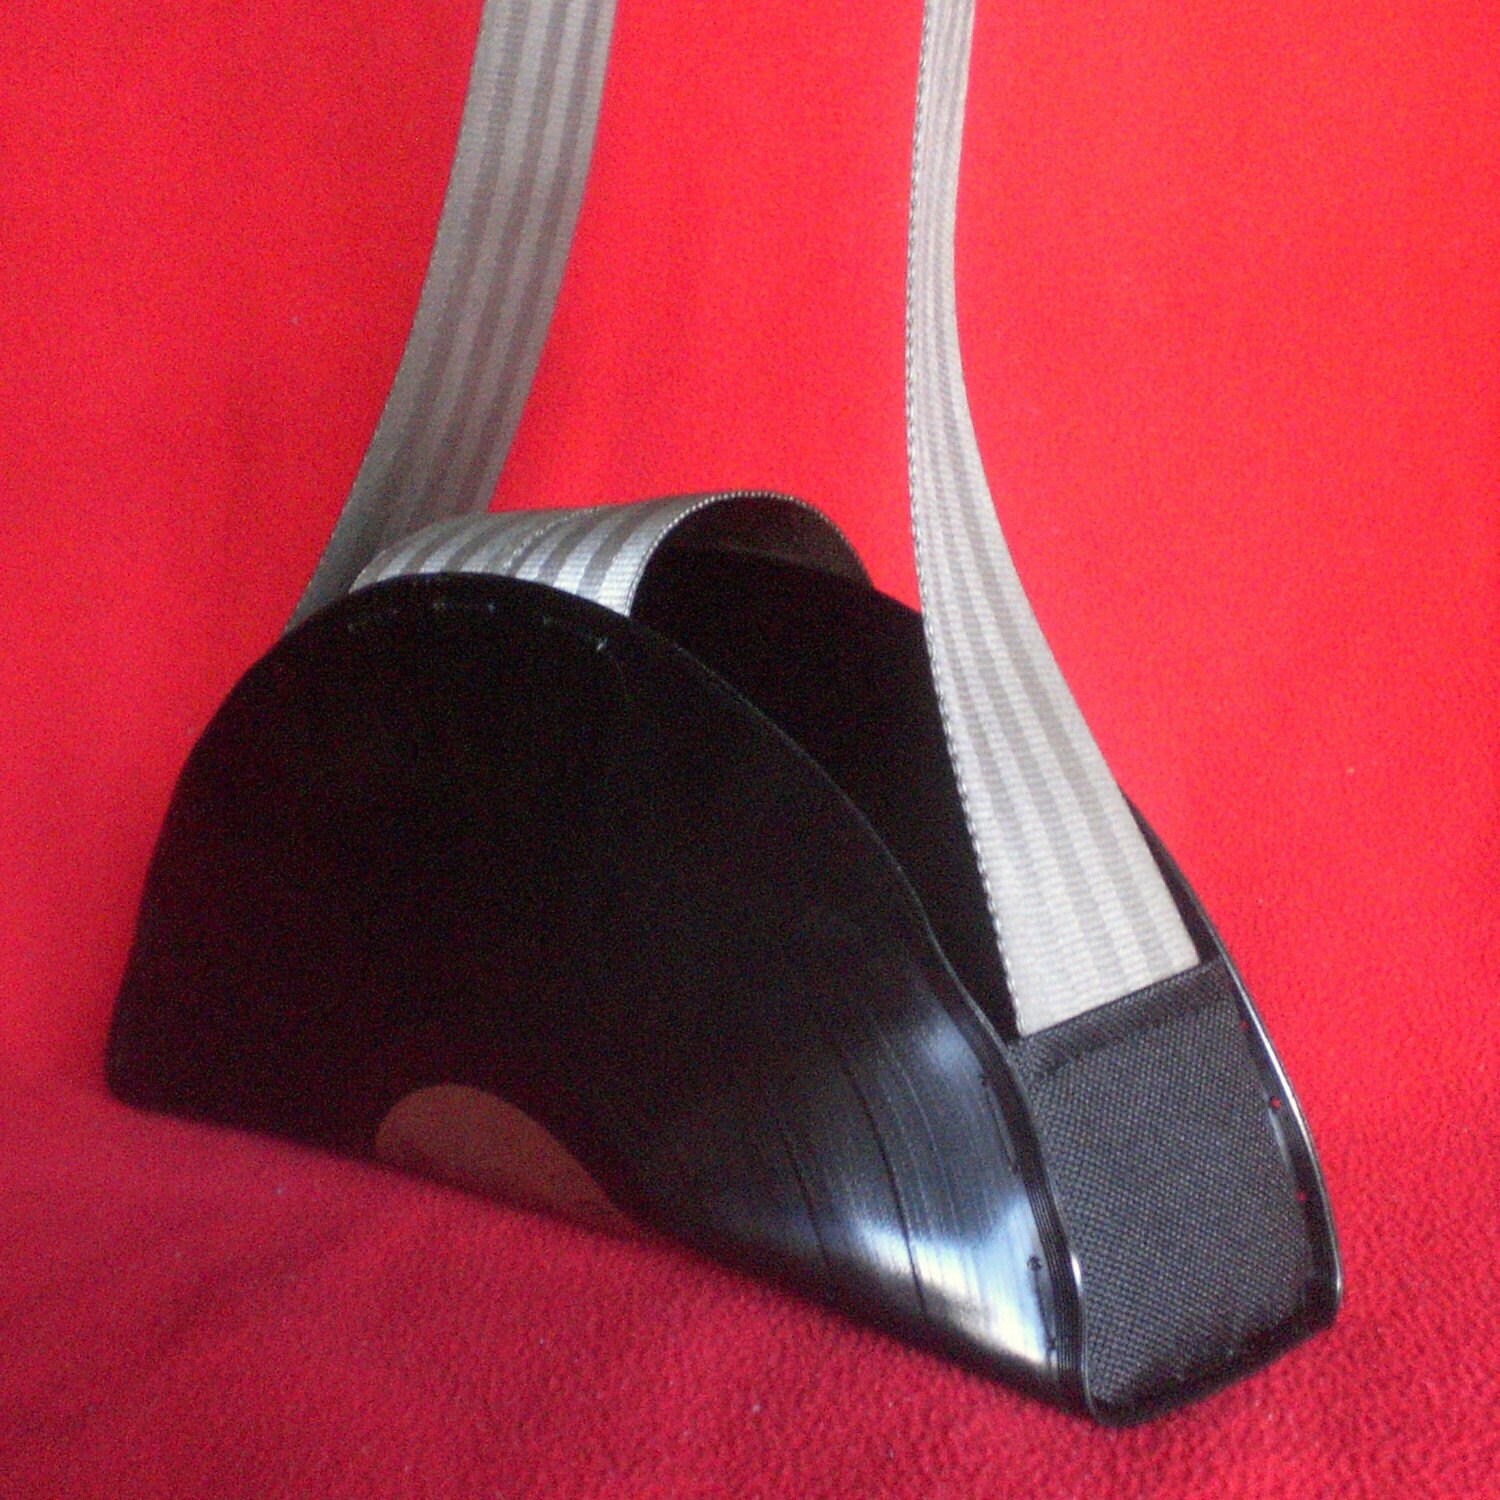
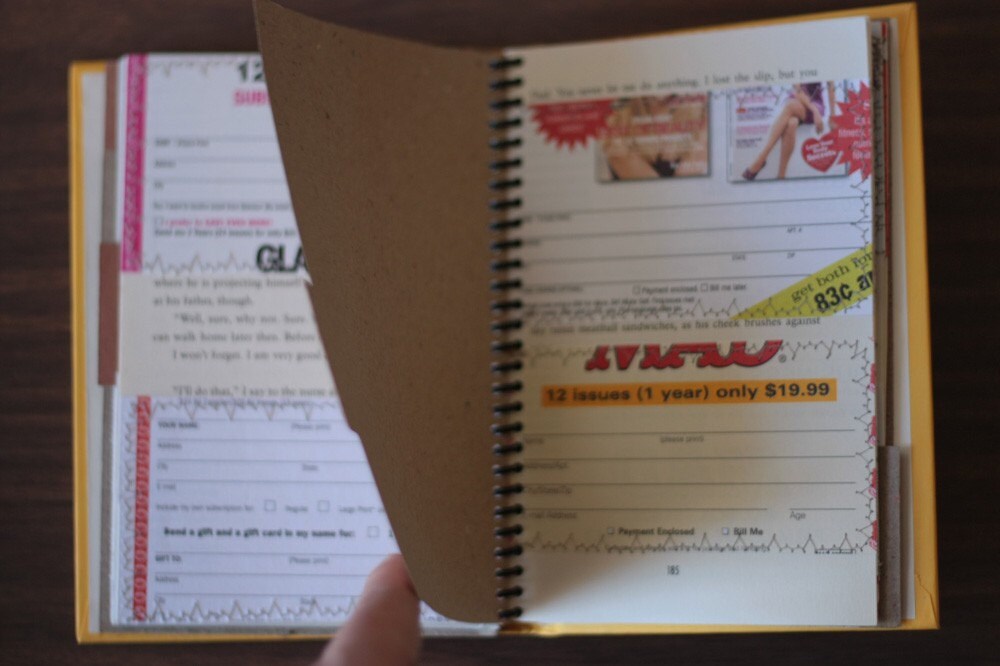
I'll be honest:  the most recycling I do is separating my paper from plastic for the recycle guys on Monday morning.  It always amazes me what people come up with for their old stuff that may still have a little life left.  So, what do they do with all those things? Well, these fun finds have found some truly unique uses for old jeans, records, and magazine advertisements.

I don’t have any children myself, but I understand they grow up fast, often before their clothes run out. So, unless you have other children who need the old hand-me-downs, you can find a use for those jeans. For example, Nico Papergoods has made these great little journals out of children’s clothes. They come with a pocket already attached for holding pencils, markers, or other small treasures. Check out the other journal designs and map notebooks from this Swiss-born bookbinder!

Remember those days of old when we pulled out the old turntable to listen to some tunes? Well, those days are gone with iPods and such, but I’ll bet you can’t part with all those old LPs. Reclaimed Wreckage found a use for her’s in the form of a unique purse. Molded carefully and secured with a seat belt, this makes for an interesting accessory. This girl can find a use for anything: plastic shopping bags, spiral plastic rings, newspapers, bike tires. I think she’d be able to turn just about anything into a piece of jewelry, bag, or other accessory.


And finally, you know all those magazine subscription cards that fall out of your favorite zines? Don’t throw them away! Let Make Shop Live turn them into an address book for you! It makes perfect sense: the name, address, and sometimes phone and email lines are already there. Keep checking their shop this summer for more items that didn’t get thrown out!
Now that you’re inspired by all these cool ideas, go turn that old shower curtain into something fun!

Thursday, March 4, 2010

Thursday Threads - Kreinik.com

I’ve been spending a lot of time on the Kreinik website lately. This company is mostly known for their metallic threads but I’ve discovered they also have a lot of other cool stuff.

I originally went on there to see if they had any free patterns since I’m always looking for freebies. And they certain have a good selection! Everything from beads and crochet to stamping and scrapbooking. So of course, I headed straight to the cross stitch section where I found a cute Valentine’s Day pattern for conversation hearts (like the candies). It uses Silk Mori thread and Eyelet heart “Tokens and Trifles” sewing cards. Well, I missed Valentine’s Day so I’m definitely keeping this in mind for next year! The heart sewing cards are a bit expensive (about $10 each), but I bet I can do something similar on regular perforated paper with a nice border.

So then, I surfed some more and found a lovely Easter egg ornament pattern. It uses several pastel metallic threads, Stik ‘n Puff shapes, and trim, all stitched on 28 count Jobelan pastel fabrics. Well, I have time until Easter so I thought, “What a great idea!” There are lots of specialty stitches on these so my talents will be tested! Might be good fodder for a future “Tuesday Tips” blog…

I then went to the “Kreinikmall” to place my order for the threads. This is where it got a little confusing. Apparently you don’t buy directly from Kreinik but through stores that sell Kreinik products. So I clicked on my nearest shop, placed my order, and voila! I then got an email from the shop stating they would order it next week and I would get it soon thereafter. I’m beginning to think I might not make it by Easter, at least not for any Easter sales. Chalk this up to experience!

So, what else can you find at Kreinik? Of course, there are the threads and braids: metallic, machine sewing, silk, iron-on, real metal, and embellishments. Then there are color cards, “Tokens and Trifles” sewing cards, various kits, sewing tools, tapes for costuming, paper crafts, and fly fishing.

That’s right: fly fishing. Apparently this company makes materials that are durable enough to make fish flies. Everything from thread to patterns to foam tying discs and special scissors. I don’t think the hooks are included. I guess fish like the shiny threads too. Who knew?

Another item of interest on the website is the Education section. Here you can find videos, a stitch library, and other articles. The stitch library may not always give specific instructions, but the diagrams are nice as are the hints on when to use each stitch.

I will definitely have to come back and see about these new holographic threads.  The flecks of color in them create a 3D effect. Hmmm… psychedelic Easter eggs…

Tuesday, February 23, 2010

Tuesday Tips - Choosing your fabric

The type of fabric you choose can really do wonders for the project you are working on. It can change the texture and add to (or detract from) the artistic style. The weave style, color, and fibers all add to the perfect piece of cross stitch or embroidery fabric.

Weave Style
Most beginner projects are done on even weave fabric called Aida. This fabric comes with nice, neat squares that make it very convenient to match up with the graph lines of your chart. It helps makes basic cross stitches evenly spaced and symmetrical. However, you can see the fabric more clearly in your background.

For more detailed projects, you might want something a little more sophisticated. This may call for a smaller weave fabric like linen or, one of my favorites, Jobelan. Having a smaller weave fabric keeps the background of the design smooth and fresh-looking. Also, creating partial stitches is easier with a smaller weave because you don’t have to try to poke your needle through a mass of fabric – the hole already exists. However, you must be more careful of the tension of your stitches to keep them neat and even.

Uneven weave linen can be more difficult to stitch on because the thread rows are not the same. Distortion of your project may occur. I have not had the opportunity to work on such fabric, so I can’t give a personal account. (Quite frankly, it scares me a little!)

Color
There are so many colors available in fabric choices. Of course, there is the standard white and antique white, but you can work on red, blue, black, pink, or virtually any other color of the rainbow. Your choice may depend on many factors:
  1. the color of the room where you will put the final product
  2. your choice of complimentary or contrasting color of the design
  3. whatever scraps of fabric you have in your inventory
To add to your choices, you not only have solid colors, but hand dyed fabrics as well. These can come in opalescent and other marbled colors that really add texture to your finished piece. A hand dyed blue may be a great look as a cloudy sky on a landscape piece. Here is an example of Silkweaver’s Expressions “Blue Fusion” on Lugana.

Pre-printed fabrics are also available that have a small screen-print design, like hearts, gingham, or stripes.

My tip on color revolves around darkness: dark colors are much more difficult to stitch on so make sure you have plenty of light. It also helps to have something light-colored behind your fabric, on your lap or other work surface, so that you can more easily see the holes.

Fibers
Popular Aida fabrics are created with cotton fibers. Plain, easy to wash, and durable. But there are others: metallic, silk, rayon, perforated paper, and waste canvas.

The softer rayon/cotton blends have a nice sheen to them and are very easy to handle. Many also do not wrinkle easily. Linen and a new piece of Aida can be a bit stiff until you’ve worked with it a while. Metallic is usually a cotton fabric with a few strands of metallic thread woven through to create a look that shimmers. You have to see this style in person, pictures don’t do it justice.

Perforated paper is exactly that: thick paper with holes in it. This is often used to create ornaments or bookmarks because of its durability. It comes in either a plain sheet or pre-cut designs like hearts or doilies. Go to the Kreinik Tokens and Trifles website to see more examples.

Waste canvas is used as a guide for stitching on a piece of fabric that is not made for cross stitch, like a shirt or table linen. You stitch the canvas on top of the shirt just as you would any other project. Upon completion, you simply wet the fabric and gently pull out the waste canvas from the under the stitches, leaving your image untouched.

So, as you can see, it’s not just the pattern that makes your work stand out. The fabric is the foundation of your masterpiece.

Friday, February 19, 2010

Friday Fun Finds - Think Spring!

I don’t know about you but I think I’ve had enough snow to last me quite a while! So this week I am “Thinking Spring!” with my Etsy finds.

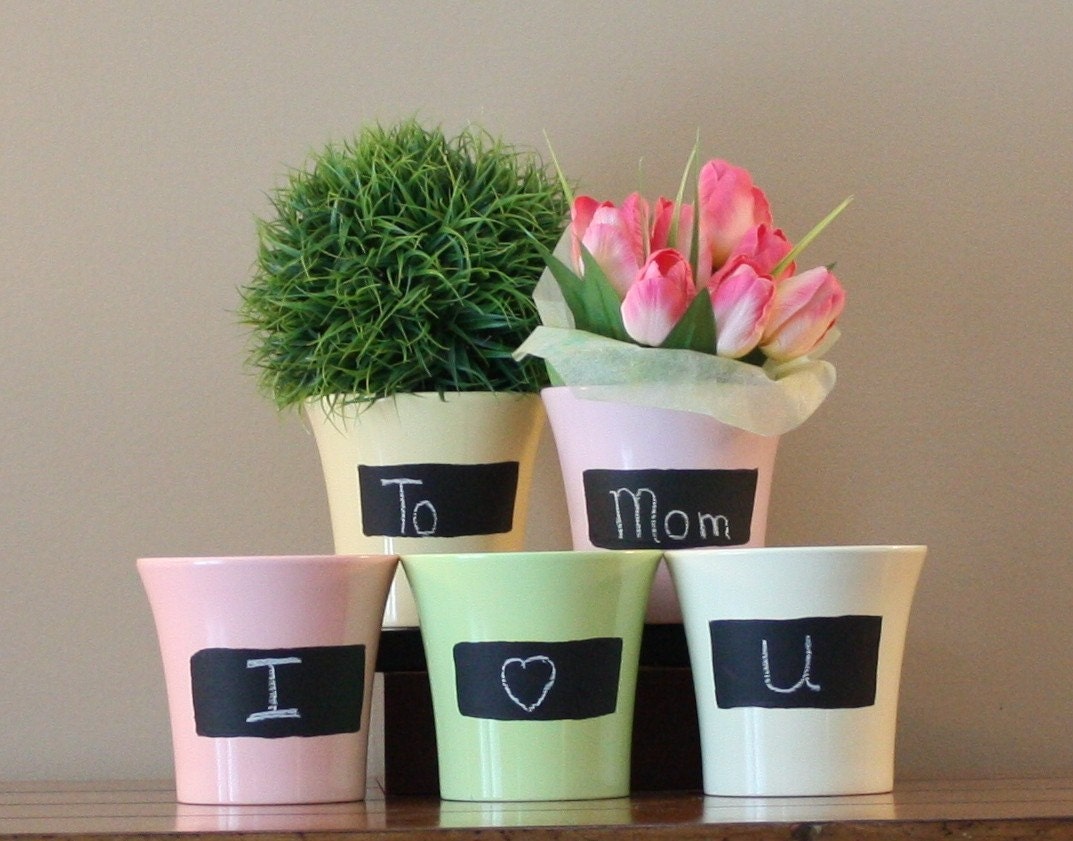
For Valentines Day, there was a chalkboard placemat. For Spring, we have chalkboard pots by Chalk Notes. These 5” pots hold your pretty spring buds and have a little space where you can write a quick note! They come in five different colors: pink, purple, yellow, green, and cream.

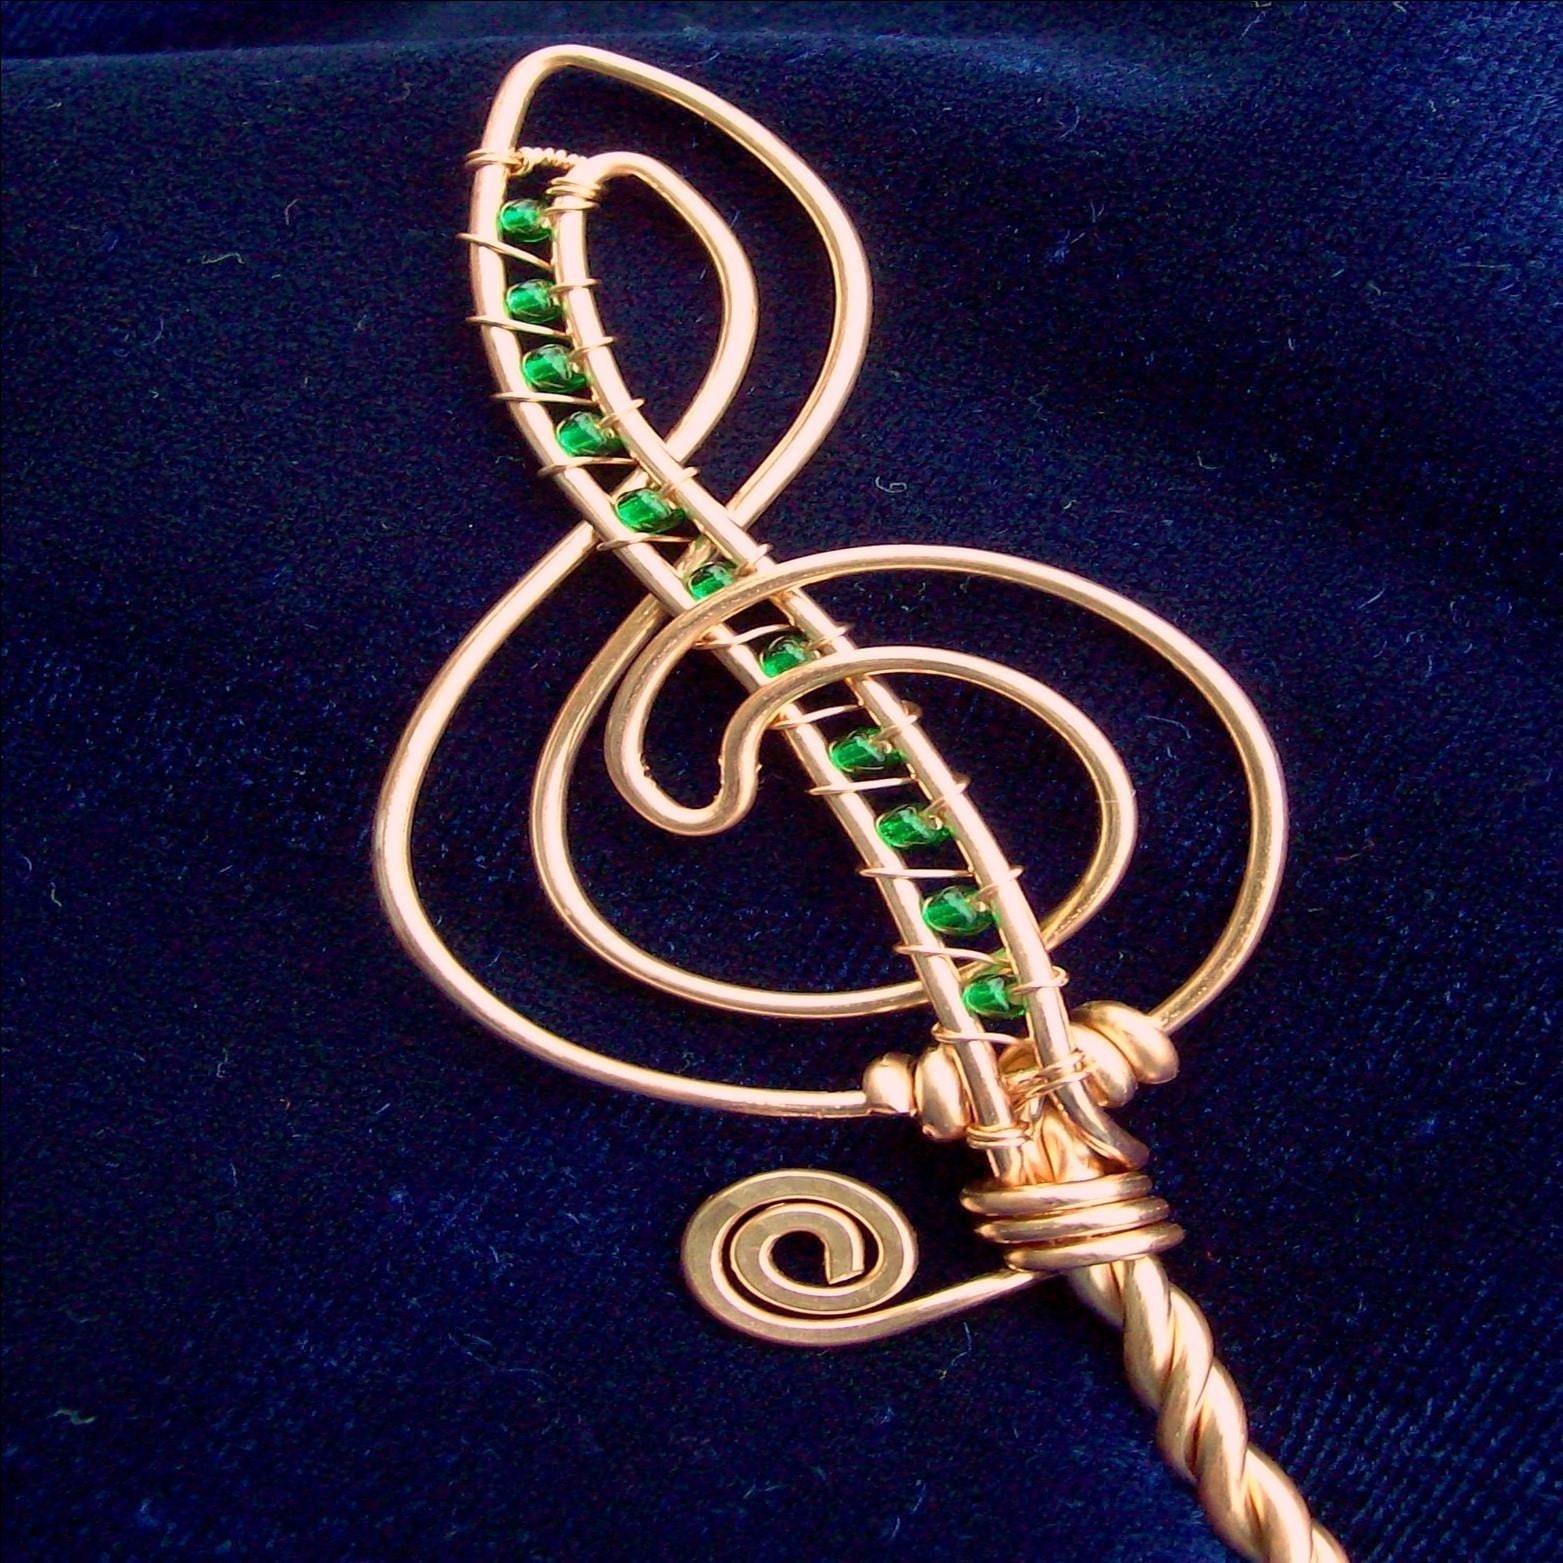
Now that it’s getting warmer (or supposed to be!), we need to think about getting outside to play. And who doesn’t like bubbles? As a musician, I just love this Treble Clef Bubble Wand by Purple Bus Studios. It is almost 8” long and made of copper wire and colored glass beads of your choice. My kitties would love to chase the bubbles this creates!

And after having all that fun outdoors, you’ll probably have some pictures to display. So put them in one of these “Cool Spools” by Iris Blue Artworks. Made from vintage sewing spools, the curled wire is just flexible enough to hold your pictures, notes, or whatever else you can think of. These come in lots of fun colors and designs, so of course I choose the kitty design. :-)

All pictures were used with permission from Etsy sellers.

Thursday, February 18, 2010

Thursday Threads - Basic Tools of the Trade

My first Thursday Threads article is going to focus on the basic “tools of the trade” for cross stitch and embroidery. Future articles may go into more details, so I’ll just touch on them here. They are very similar items between the two crafts. In a nutshell, the items are: needles, thread, fabric, a hoop, and scissors.

Fabric
The most popular cross stitch fabric is called Aida. It is an even weave fabric with pre-defined squares that correspond to your pattern. It comes in many counts (squares per inch): 11, 14, 16, 18.

Another popular favorite is linen. This can come in even weave and uneven weave (or natural linen). Linen usually comes in much higher counts, making it necessary to stitch “over 2:” 25, 28, and 32 counts are popular.

One of my favorites is an even weave fabric called Jobelan. The threads are very well defined and make for a wonderfully smooth background on my larger pieces.

Most fabric comes in many colors, including hand dyed that can have a mottled color look. This adds an interesting look and texture to your pieces.

Needles
The needle used for embroidery and cross stitch is called a tapestry needle and is a little different than your typical sewing needle. For one, it is not as sharp. The tip is blunt because the sharpness is unnecessary due to the nature of the fabric used. As discussed, most cross stitch fabric already has holes in it to align your stitches so the sharp point is usually not warranted.

Also, tapestry needles can be shorter to allow you to work up to those last 2 inches of thread, causing less waste.

And finally, the eye of the needle is larger to allow for multiple strands. Most cross stitching is done with 2 or 3 strands of thread, so this larger eye makes threading the needle much easier.

Typical tapestry needle sizes are 22, 24, 26, or 28. Size 24 is most popular, while size 28 is shorter than the others. They can come in platinum and gold plated as well, for added durability and reducing the likelihood of tarnishing from use.

Thread
Embroidery thread (also called floss) comes in a skein (for knitters, this is similar to a hank) or bundle, with each thread consisting of six strands. Since most stitching is not done with all six strands, you must be able to separate the thread into the appropriate number to use.

DMC, Anchor, and J&P Coats are popular embroidery floss manufacturers. DMC probably has the widest color selection and is found in most stores. There are also variations on thread type (silk, rayon, metallic, pearl), but the 100% cotton threads are your most popular.

My biggest tip on threads is to not mix manufacturers within a stitched piece as the texture may vary from one to another!


Hoops
In order to maintain an even texture and weave, you need to be able to keep your fabric taught. Stitching by holding the fabric in your hand will create a lumpy look because the tension between each stitch is different. Putting your fabric in an embroidery hoop creates a flat surface to work on.
Hoops also come in many sizes and styles. It is recommended to work with a hoop that fits the size of the piece you are working on. The most popular hoop is a round wooden hoop. I use this style the most. I’ve had the same hoop for so many years, it has worn to a nice smooth finish! However, extended use may cause cramping in your hands. Which brings me to another style…
… called a Q-snap. This type is made from plastic tubing and creates a square frame. It is larger than the wooden hoop, making it easier to hold especially if you have any arthritis or other muscular issues in your hands and arms. I have had an issue with this style when working on darker fabric: the white plastic may leave marks that are difficult to wash out.

For either of these hand-held hoops, you should always remove the hoop when you are not stitching to reduce hoop marks and crushing of the threads.

If you are working on a large piece, a giant hoop may not be practical. For these projects, you may want to invest in a frame, either lap size or free standing. These come with scroll bars so you can move your fabric easily without wrinkling it as you stitch from one area to another. I’ve not had much success with these myself, but I hear they are great to use on big pieces. I must not have bought a good one like this…


Scissors
It may seem obvious, but scissors are also a necessity for your stitching. But they should be small sharp scissors, not the ones out of the kitchen drawer. Most embroidery scissors are 4” or 5” long. Keeping them sharp allows more precise snipping of the thread on the back of your fabric.

A tip to keep from losing them between the seat cushions: tie a long piece of ribbon to them to hang around your neck or just have as an extension. Much easier to find!

(This is pretty fancy!)


Note: all of my suggestions are available on ABC Stitch Therapy.

Thursday, February 11, 2010

Etsy shop update - new listings!

Boy, I can get so much stitching done when I don't have to go to my day job!  While I've been snowbound this week by 30 inches of the white stuff, I have finished and listed the following 3 projects and posted them in my shop.

8" x 10" framed Old Irish Blessing
This popular blessing was inspired by a gift I received from an old friend as a housewarming present.  It has become one of my favorite sayings as the words bring comfort to my heart.


Bookmark  - "Is it getting good?"
This is another one of my vinyl weave bookmarks, featuring a cute brown puppy.  He is anxiously awaiting the exciting climax of the story you are reading.

Magnet - "Call your mother, she worries."
Good advice for all those busy, young people out there.  Just give them a gentle reminder to call home now and then.

Friday, February 5, 2010

Friday Fun Finds - Valentines for You!

Since Valentine’s Day is just around the corner, I thought I’d do a search on Etsy of fun V-Day stuff. There are hundreds of items to chose from, so here’s just a sampling…

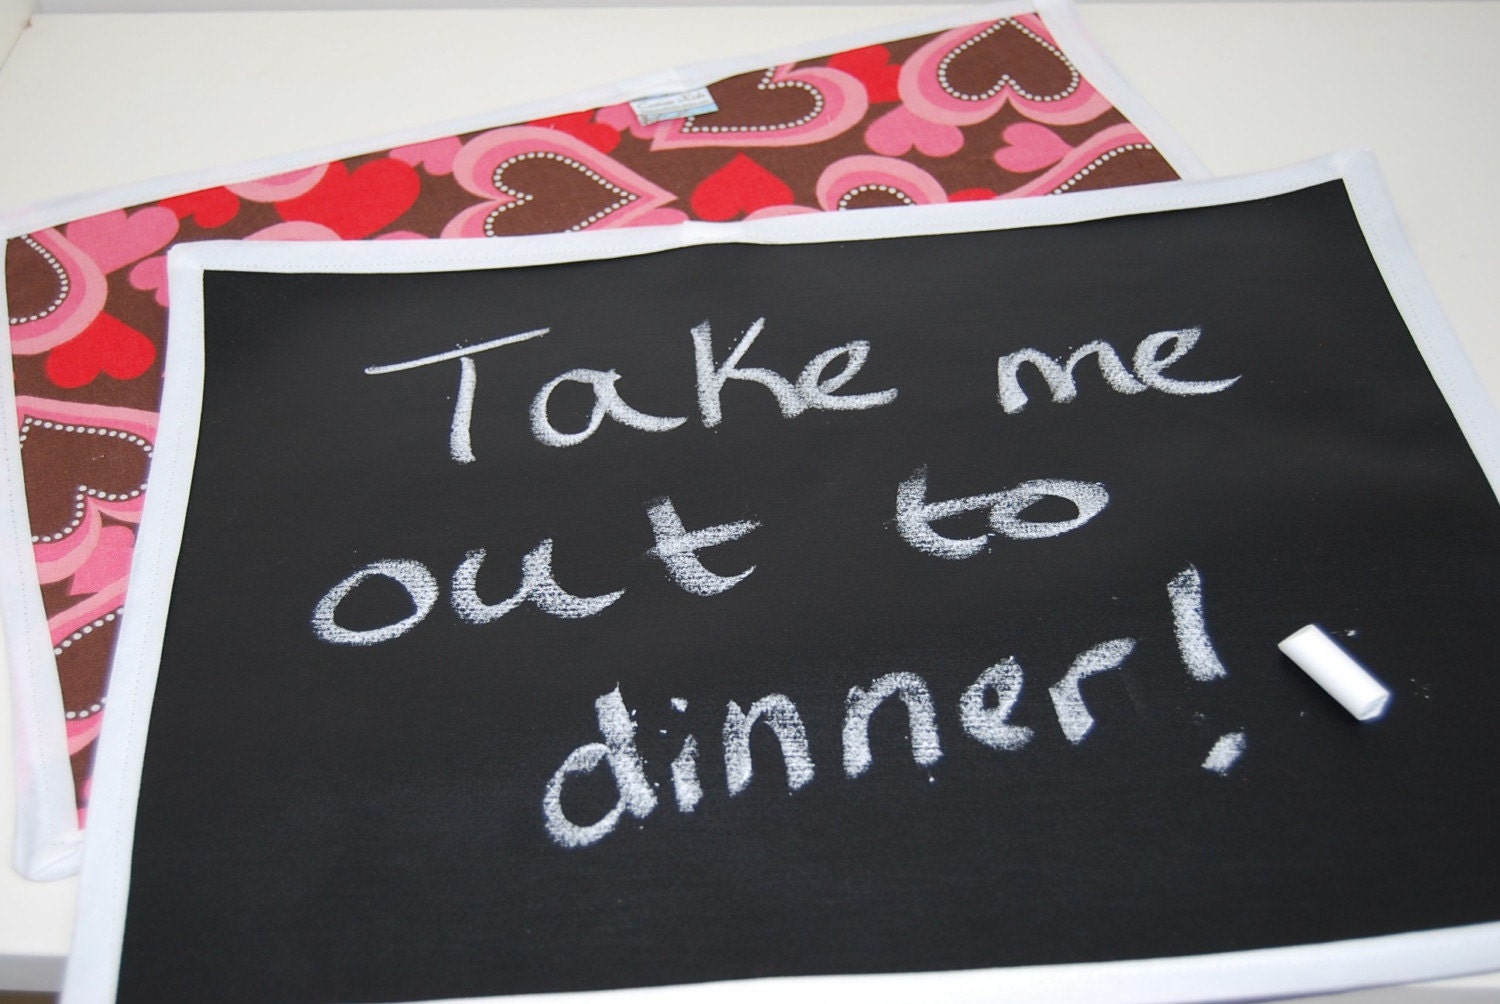
First up, is a chalkboard placemat by Custom Kid’s Shop. It is geared towards keeping kids busy at mealtime, but why can’t you leave a (not so) subtle hint for your sweetie about dinner plans?


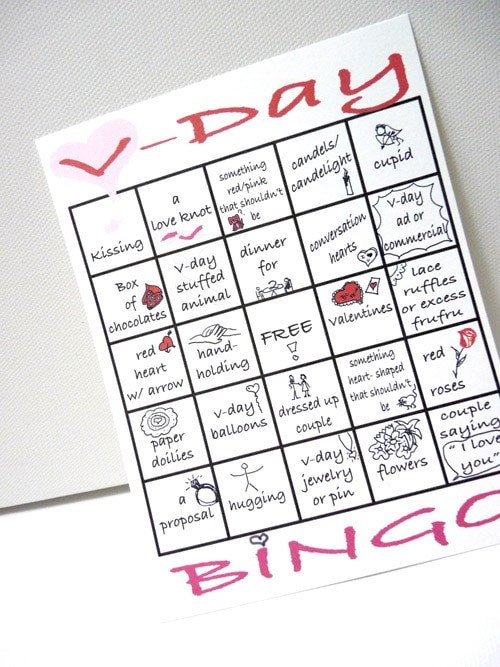
Next, it’s time for a game. Tiny Mishap’s sells a set of 2 or 3 Valentine’s Bingo cards. Play with your single friends or just check them off as the week goes by. Get your daubers out!

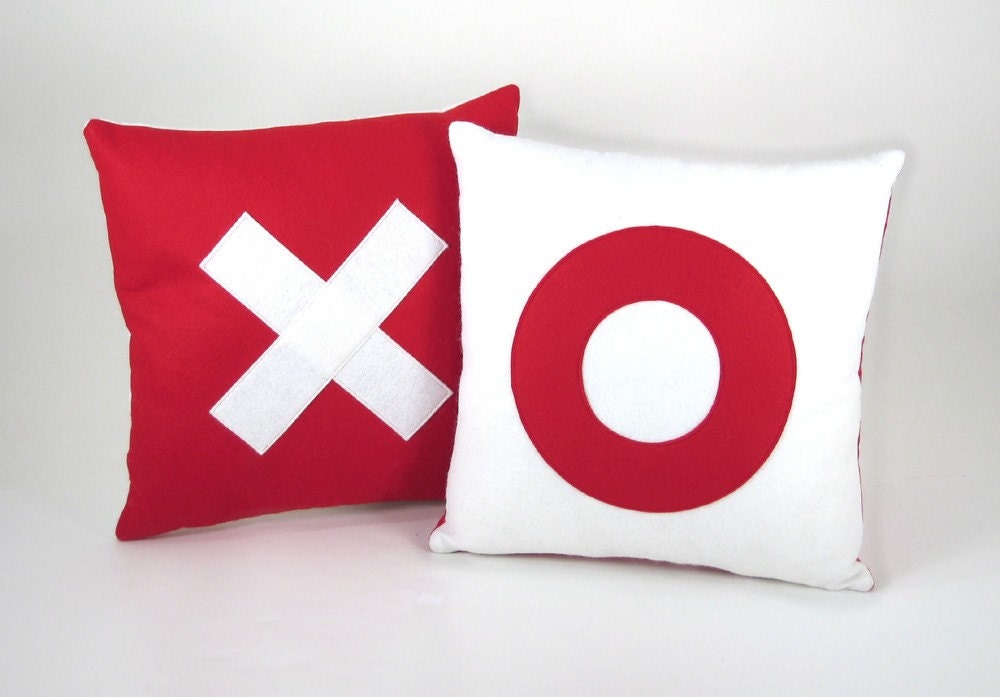
And finally, something to snuggle up with. These pillows from Sofa Garden make it quite clear what is on your mind this Valentine’s Day.  They look pretty comfy even without a special someone!


So make sure you have a little fun this Hallmark Holiday!

Tuesday, February 2, 2010

Tuesday Tips - Patterns, Patterns Everywhere!

There are so many cross stitch patterns (a.k.a. charts), kits, and designs out there. How do you choose?

What to stitch may be the most difficult question. Ask yourself these questions:

1. Do you want to create something for yourself or a friend?
2. Do you want to create a picture or other home décor item?
3. For the image, do you want natural scenery, animals, people, or words?
4. How big do you want the item to be?

Once you get an idea of what you want to stitch, determine your experience level. For beginners, there are many kits available. I like kits because they come with just about everything you need to start stitching – chart, needle, thread, and fabric. The only thing you need to own is an embroidery hoop and scissors. You might even find some that come with a hoop you can use for stitching as well as finishing.


Usually beginner projects come as small ornaments since it is easier to do a small project when you are just starting out. Lots of good examples can be found here at 123stitch.com.

There are also weekend kits, designed to be completed in a weekend. These are a little more detailed. You can find all sorts of kits at WeekendKits.com.

Then there are the more advanced charts and kits. Dimensions Gold kits are some of my favorite kits. Some have metallic threads and beads for accents. The thread sorter cards are also a real timesaver, after you finish sorting that is! Putting in a little extra organizational time before you start stitching will really pay in the end. Most colors are pretty straight forward, but make sure you have good lighting when sorting. “Light gold” and “light yellow-orange” may look very similar but serve very different purposes in your pattern!

Now that you have your pattern, how do you read it?


Charts are printed to look like graph paper. Each square contains a symbol that represents a specific thread color. Some graphs are also color-coded, making it easier to read. There is a key included that shows the symbol, color (and number), and number of strands to stitch with. If you are using your own thread, then you are probably using DMC or Anchor brand embroidery floss. Each of these threads are identified with a number. For example, black in DMC is 310 but in Anchor it is 403, so make sure you are using the right brand indicated in the pattern or you could get some interesting color combinations!

If you are using Aida fabric, the most common cross stitch fabric, each square corresponds to a square on your chart. For higher count fabrics where you are “stitching over 2,” a square in the chart is essentially 4 tiny squares in your fabric. (We’ll get to the tougher stuff like this at a later date.)

So there you have it. A few tips on getting started choosing a pattern and what the chart looks like.

Time to Get Organized!

So now that we are well into 2010, I decided it’s time to get this blog organized. It started off as a way to showcase some of the neat things I see on Etsy but then morphed into something more personal. Now that I’ve reconsidered things, I think I’m going to try a more methodical approach: an actual craft blog. What a concept!

My hope is to post more regularly about topics that interest cross-stitchers (in particular) and other crafty-types. There will be some “how to’s,” some product reviews, some Etsy items that strike my fancy, and the occasional update on what project I’m working on. Here’s the general outline:

• Tuesday Tips: stitching tips and “how to’s"
• Thursday Threads: reviews and tips on stitching supplies, fabrics, and threads
• Friday Fun Finds: Etsy items, products, and other stuff I find on the web I want to share with you

I know you can go to many different blogs and websites and find similar topics, but maybe my experiences will give you another view on cross-stitching and needlecrafts. Please feel free to comment anytime or share your own tips relevant to the topic!